

Archive for the 'Floppy Emu' Category
Bootstrapping Apple //c with Floppy Emu
Thanks to Floppy Emu fan Andru Luvisi for contributing a great trick for bootstrapping an Apple //c with Floppy Emu. The Apple II family computers can normally only boot from Disk 1, but when Floppy Emu is connected externally to a //c and configured in 5.25 inch emulation mode, it becomes a non-bootable Disk 2. Until now, the options for making Floppy Emu bootable on a //c were:
- Switch the Emu’s emulation mode to Smartport hard disk, which is bootable
- Boot from a real 5.25 floppy in Drive 1, and then access the Emu as Drive 2
- Connect the Emu internally, in place of the real 5.25 inch floppy drive
- Use an A/B switch cable to connect the Emu and the real 5.25 inch floppy drive internally
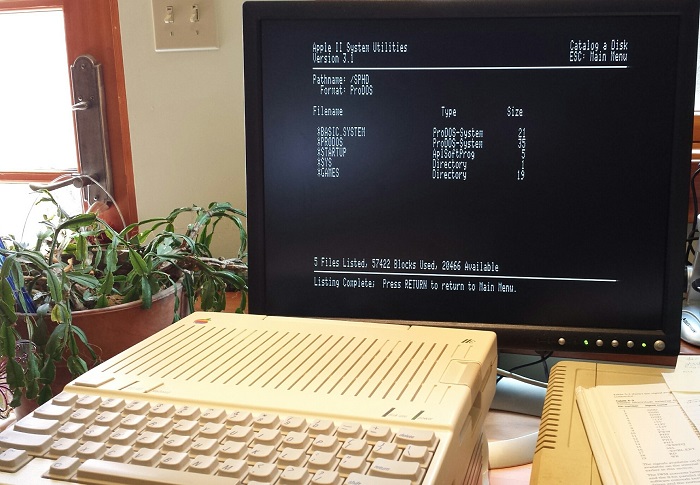
Andru has devised a method for booting the //c from the Floppy Emu while it’s connected externally and configured in 5.25 inch emulation mode. In other words, it’s a method for booting from Disk 2 – something that’s normally impossible. This is great for the scenario where you want to make a bootable ProDOS floppy, and you’ve got a Floppy Emu, but no real floppies with a bootable DOS. Now it’s possible to boot from the Emu externally, then put a blank floppy in the //c’s internal drive and copy ProDOS to it.
- Connect Floppy Emu to the //c’s external disk port, and turn on the computer.
- The //c will display a CHECK DISK DRIVE error.
- Select ProDOS v1.9 from the Floppy Emu’s disk selection menu.
- Press CTRL+RESET on the //c keyboard to get a BASIC prompt
- At the ] prompt, type CALL -151 and press RETURN
- At the * prompt, press CTRL+E, then press RETURN
- You’ll see a line of text like M=00 A=08 X=00 Y=00 P=00 S=B7.
If the line of text begins with M, then type
:0 E0 60 1 and press RETURN
Else if the line of text begins with A, then type
:E0 60 1 and press RETURN - Type C60BG and press RETURN
The //c will immediately begin booting ProDOS from Drive 2!
Andru developed this method by examining code from Apple //c ROM version 255, which includes this feature natively as PR#7. The above monitor hacking makes it possible to do the same thing on other ROM versions of the Apple //c.
I was successful using this method with ProDOS v1.9, as well as with a few other utilities and games. Unfortunately most games won’t work using this method. They’re hard-coded to expect booting from Drive 1, so if you try this method they’ll start to boot from Drive 2, but then you’ll hear Drive 1 suddenly begin to grind away, and the game will freeze or display an error. Despite this limitation, booting 5.25 inch disk images from Floppy Emu as Drive 2 is still a very handy trick!
Read 1 comment and join the conversationNow Available – New Enclosure Styles

After several months of experiments and refinements, two new enclosure styles for Floppy Emu are finally available for sale. First up is a Snow White case with the looks of a miniature external floppy drive. The grooved white laser-cut case mimics Apple’s vintage Snow White design style, made famous by machines like the Apple IIc. This case uses a matte finished acrylic that’s slightly textured, and will look at home alongside your other retro computer hardware. The buttons in bright blue provide an attractive visual contrast, adding an extra touch of class.


The second new style is frosted ice, and it’s replacing clear acrylic as the default case style for the deluxe bundle. The frosted ice case has a matte finish that resists fingerprints, and allows some light through without being totally transparent. It retains the “happy computer” etched logo from the earlier case style. Frosted ice has a retro-futuristic vibe like a 1960’s sci-fi drama. Danger Will Robinson!


Both new case designs incorporate a small but significant change to the button stalks, which are 0.3 mm taller than before. This should help minimize button slippage caused by variations in the acrylic material thickness.
You can find the new cases in the BMOW Store.
Read 2 comments and join the conversationSnow White Case Experiments

It’s been a few months since I experimented with some alternative laser-cut and 3D printed case designs for the Floppy Emu disk emulator. The most popular case concept was the Snow White design, intended to complement the design style and color of mid-1980’s Apple computers. I’ve continued to experiment with the Snow White design as time permitted, and have finally arrived at a laser-cut Snow White case that I’m mostly happy with.
The laser-cut case is constructed from the same matte white acrylic that I used in the last prototype, which is about as close to vintage Apple coloring as I can get. But instead of subtle engraving for the case lines and other details, they’re now cut-outs that go all the way through. It’s hard to see in the photos, but the matte acrylic also has a slight texture to it. This creates a look that’s quite different from the smooth gloss normally associated with acrylic. I like it a lot.
With this prototype, I also tweaked the button plunger size very slightly, which should help give the buttons a tighter feel.
A question to readers: What do you think about the single grooves on the lower part of the sides? Good or bad? I was trying to echo the design of the top plate’s lines, but I’m not sure if plain solid sides would be better.


Working with a friend, I also did a few more experiments with 3D printed cases. These look attractive and are quick to assemble, but I concluded they’re just too slow and expensive to manufacture. I won’t be making any more 3D printed cases, but the remaining 3D printed prototype cases are available for sale if anyone would like one.


My goal is to create a polished Snow White case option that I can offer as an alternative for people who prefer this style. Meanwhile, I’m also working on some refinements to the standard case… more on that soon!
Read 3 comments and join the conversationNew Firmware for Floppy Emu

After a long period of hibernation, today I’ve released a set of firmware updates for the Floppy Emu disk emulator. These updates provide a few user interface improvements taken from customer suggestions over the past year, and also fix a couple of small bugs. Enjoy!
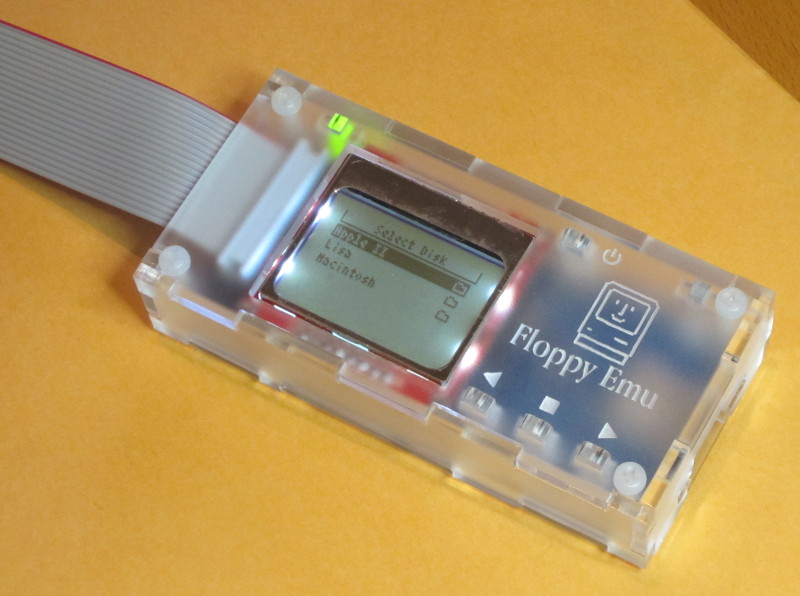
Ellipses in Long File Names – Don’t you hate it when you’ve got several disk images with very similar names, like Operating System Install Disk 1.dsk, Operating System Install Disk 2.dsk, and Operating System Install Disk 3.dsk? On the Floppy Emu’s built-in display, while browsing the contents of your SD card, the end of those long filenames were all cut off. You couldn’t tell which one was which when selecting a disk image from the menu. With today’s firmware update, the middle of those long filenames will now be replaced with an ellipsis, retaining the beginning and end of the name. Several people have been asking me for this feature for at least a year, so here you go.
Obvious Errors for Unsupported Disk Image Types – The Floppy Emu is always running in a specific emulation mode, like Apple II 5.25 Inch mode or Macintosh HD20 Hard Disk mode. When you’re browsing the contents of your SD card, the Emu knows which disk images are supported by the current mode, and which aren’t. The old behavior was to only display supported disk images and hide the others, but this seems to have confused everybody and left them wondering why their files disappeared. The new behavior is to list (mostly) all the files on the SD card, then show an error if the user selects something that isn’t a disk image supported by the current mode. In this case, you’ll see “disk image type is not supported in the current emu mode”.
Emulation Mode Highlight – Speaking of emulation modes, many people didn’t seem to realize that they exist, resulting in confusion when using the wrong mode or not knowing how to change modes. I can ask them to RTFM, but it would be nice if the UI made it more obvious. I’ve changed the Emu’s startup screen to display the current emulation mode right at the top, in inverse text, so hopefully it will now be impossible to overlook. I also fixed a subtle problem that affected people who switched from the Apple II firmware to the Mac/Lisa firmware: the Emu was defaulting to Lisa 3.5 Floppy mode after the firmware update. Quite a few people didn’t notice, and then couldn’t understand why floppy emulation didn’t work with their Macintosh. I’ve changed the behavior so it will now default to Macintosh 3.5 Floppy mode after the firmware update.
Get the new firmware here:
Macintosh and Lisa, for all Floppy Emu models: hd20-0.7G-F14.5
Apple II firmware, for Floppy Emu Model B: apple-ii-0.1R-F8
Apple II firmware, for Floppy Emu Model A: apple-ii-0.1R-F6
With any firmware update, there’s always a chance that I’ll accidentally break something, so please give me your feedback on whether these new versions work for you.
Read 9 comments and join the conversationFloppy Emu on the Apple III

The poor sad Apple III never gets much love. It wasn’t popular in its time, and had a short lifespan, but today it’s a sought after collector’s item. My Floppy Emu disk emulator for vintage Apple computers supports just about every machine Apple ever made except the Apple III – or does it? The enterprising Patrick Longinotti reports his success using the Floppy Emu to boot and run his Apple III system, using a custom cable and the stock Apple II firmware on the Emu.
How is this possible? The Apple III uses a 26-pin rectangular disk connector that’s physically incompatible with the 20-pin rectangular connector of other vintage Apple computers. But it turns out that Apple didn’t innovate much in their Disk III design, and the leftmost 20 pins on the Apple III disk connector are the same as the 20 pins of the standard Disk II connector (the remaining 6 pins are used for daisy chaining and auto-sense). All that’s necessary is an appropriate 20-to-26 pin adapter cable, and this guy on Tindie will make it for you! Update: a similar adapter cable is also available on eBay.

Patrick reports that he’s been successful patching in the Floppy Emu as the Apple III’s internal drive, as well as using it as the sole external drive, and also daisy chaining it behind another Disk III external drive. It can be set up as drive 1 and boot the Apple III without any real floppy media, or set up as a higher numbered drive, and used after booting the Apple III from a real floppy in drive 1. According to Patrick, there occasionally will be errors, because the Disk III drives were either slower or faster than Disk II, but for the most part it works with very little issue. (Can anyone confirm this? I thought the drives were the same speed.)
Lots of Apple III software is available at apple3.org.
The only tricky part is getting the correct gender of connector on your adapter. I’ll admit that I’m confused by the Tindie seller’s description of the gender on his adapters, because they seem backwards to me. Maybe he’s referring to the gender of the connector shroud, which is the opposite of the actual pins? To be clear, this is what I mean by a female connector:

And this is a male connector:

The 26-pin connector on the Apple III logic board is male, as are the 26-pin daisy chain connectors on the Disk III drives. The Floppy Emu has a 20-pin male connector on its PCB. With a 26-pin female to 20-pin female adapter cable, you’ll be all set. The Tindie seller has these.
The female-to-female adapter cable isn’t necessarily the most convenient solution, however. Reaching the 26-pin male connector on the Apple III logic board is a major pain, because it involves taking apart the case, and removing the entire internal drive just to get access to the port. A simpler alternative is to disconnect the existing 26-pin cable from the internal Disk III, and then attach that cable to a 26-pin male to 20-pin female adapter cable to reach the Floppy Emu. The Tindie seller has these, but they’re only a couple of inches long.
A third alternative is a very short 26-pin male to 20-pin male adapter, combined with the existing 26-pin cable from the internal Disk III, and with the 20-pin cable that ships with the Floppy Emu. But nobody sells these.
In the end, you might need to make your own cable adapters. It’s not difficult, but if you experiment with homemade adapters, please be careful not to release the magic smoke from your valuable electronics!
Read 15 comments and join the conversationLaser-Cut Case Experiments

While I continue experimenting with 3D-printed case designs for Floppy Emu, I’ve also been working on revisions to the existing laser-cut case design. These new laser-cut cases retain the same overall mechanical “box” as the original, but use a variety of materials, engraving, and opening cuts to give them new styles. Maybe one of these will become the new standard case, or an optional alternative. I’m interested to hear from readers about their opinions on these, so please leave a note in the comments below.
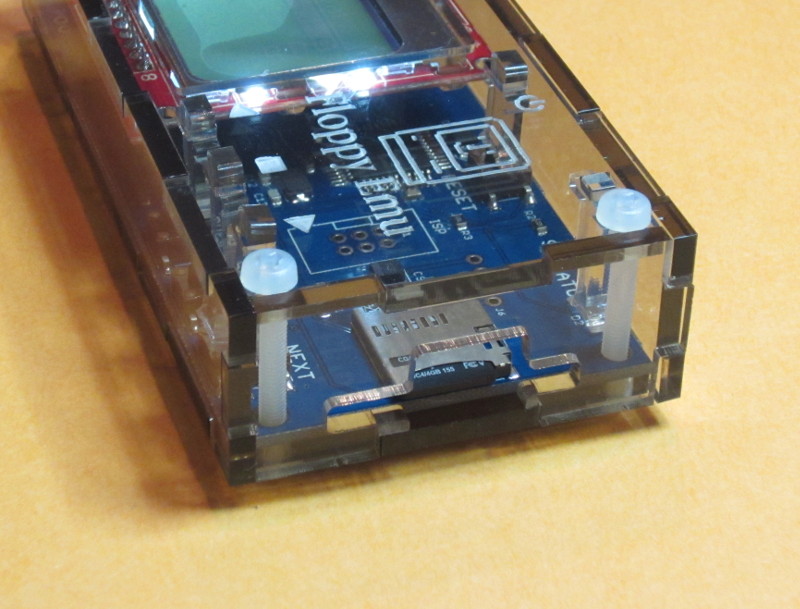
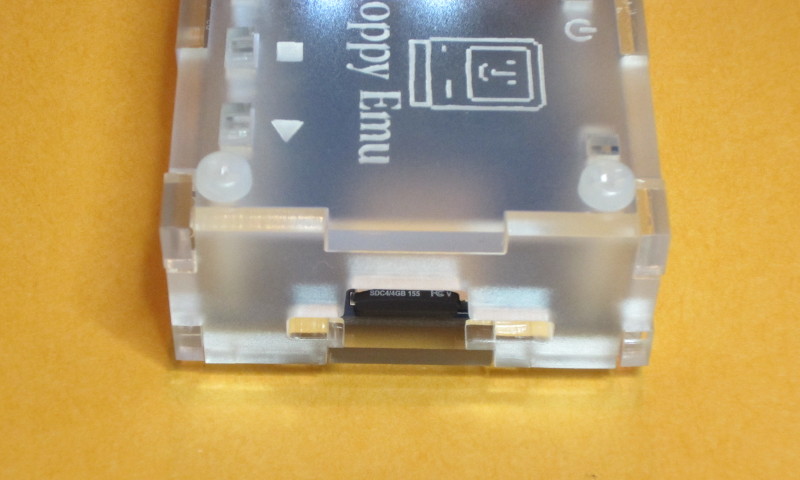
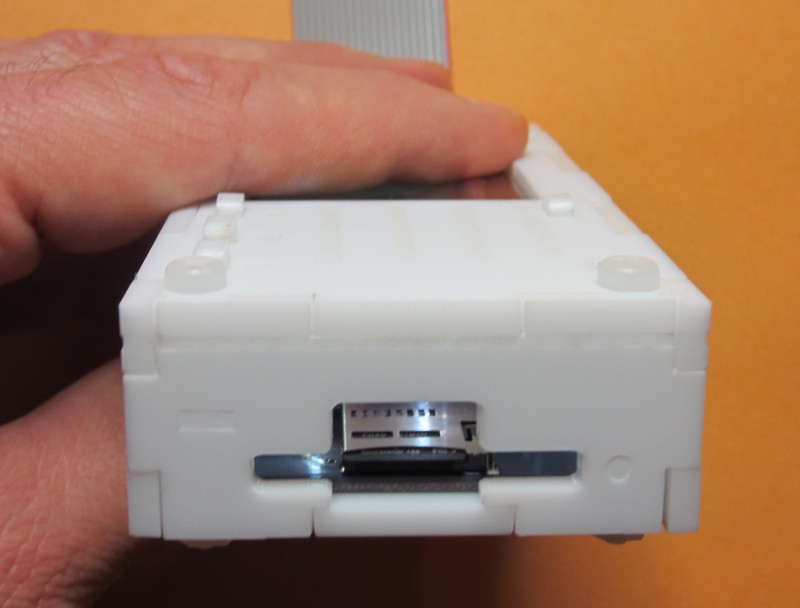
First, let’s review the existing case design that’s included in the Floppy Emu “deluxe bundle”. It’s transparent acrylic, and is great if you want to showcase the Emu’s inner chips and circuits. It looks like something an electronics fan would use with an Arduino or Raspberry Pi. The opening for the SD card is rounded, so you can reach in with your thumb and index finger to extract the micro SD card. The overall style is pretty spiffy, if I do say so myself.

One drawback of the clear acrylic case is that it’s practically invisible. It’s 100% transparent, like looking through glass, so the etchings on the case appear superimposed on the contents inside, creating a visual mash-up that’s sometimes hard on the eyes. It’s not a huge problem, but maybe a modestly-tinted acrylic case would be better than full transparent. This one is about 25% gray tinted, which is fairly subtle. The tint is obvious when it’s placed side-by-side with the clear case, but less noticeable when viewed by itself. The opening for the SD card on the tinted case is also slightly different, with a more squared-off look.


The clear and tinted cases both have a gloss finish, giving them a sort of future-tech look. Unfortunately the gloss finish also makes fingerprints stand out clearly, which is a bit annoying. But even if you don’t mind a few fingerprints, not everyone loves the see-through look. If you enjoy showing off the geeky internals, it’s great, but some people prefer a functional case that looks more like a standard peripheral than a science exhibit. To that end, I made two more case designs using matte acrylic that’s mostly or completely opaque.
The first of these is built from a “matte clear” material, which really isn’t clear at all. It’s like frosted glass, and you can vaguely see a blur of color through it, but no details. If hiding the internals is what you’re after, this will do it. The matte material has a very pleasing texture, and doesn’t show fingerprints at all, so the case always looks clean. This case uses the same squared-off opening for the SD card.
The final case is built from a matte white material, and is my attempt to create something that looks more like a miniature Apple disk drive, using Apple’s “Snow White” design cues. It has a series of parallel grooves on the top plate, like the Apple IIc and IIGS and the Apple 3.5 inch external drive. The front opening even has a fake status LED and disk eject hole engraved in it, to make it resemble the front face of a real external floppy drive. The squared-off opening for the SD card is intended to give the feeling of the drive door from a 5 1/4 inch drive. This matte white case does a pretty good job of matching the style of the 3D-printed cases I posted last time, but is much faster and cheaper to make.
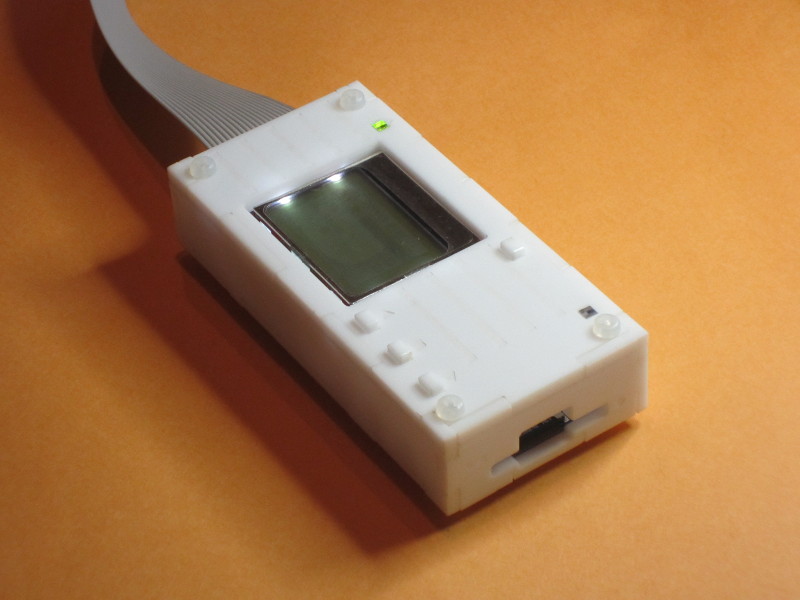

The major drawback of the matte white case is that the engraved areas are difficult to see. It’s white engraving on a slightly different shade of white background. You can see from the photos how subtle the grooves and other engraved details are. Depending on the angle of the light, they may be slightly more or less visible, but they never really stand out. The title photo displaying all four cases was actually photoshopped to make the top grooves stand out better, but the other images of the matte white case were not retouched. Overall I think it’s still a direction worth pursuing, but I definitely wish there were a way to give those engraved areas more contrast.
An alternative that just occurred to me is to actually cut the grooves and fake front details all the way through the material, instead of engraving them. This would certainly make them visible, but then you’d be able to see through to the Emu board inside. That’s not really accurate – you can’t see the Apple IIc logic board through the grooves in its case, for example, because there’s a second layer of plastic under each groove. Hmmm.
Read 7 comments and join the conversation