

Archive for the 'Bit Bucket' Category
Custom Mini Case for Macintosh LC, P475, Q605
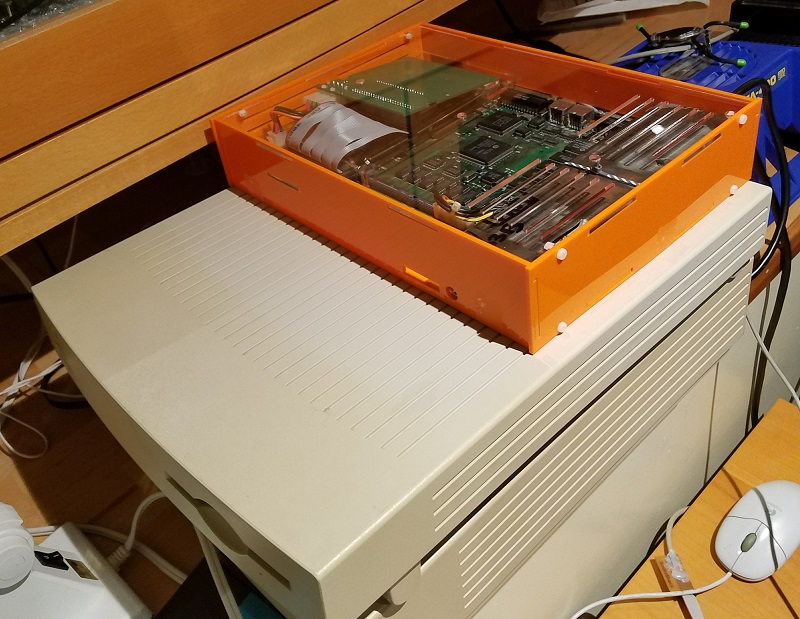
Here’s a custom laser-cut case for the Macintosh LC family, Performa 400 series, and Quadra 605. By removing the internal floppy drive and fan, and replacing the internal SCSI drive with a SCSI2SD board, I was able to make a design that’s about half the size of a standard LC case. The pieces fit together loosely with tabs and slots, and then screws and nuts in T-slots provide extra support to make everything nice and solid. The finished case isn’t much bigger than my keyboard, which is neat. Here it is outfit with a Floppy Emu and an ADB-USB Wombat:
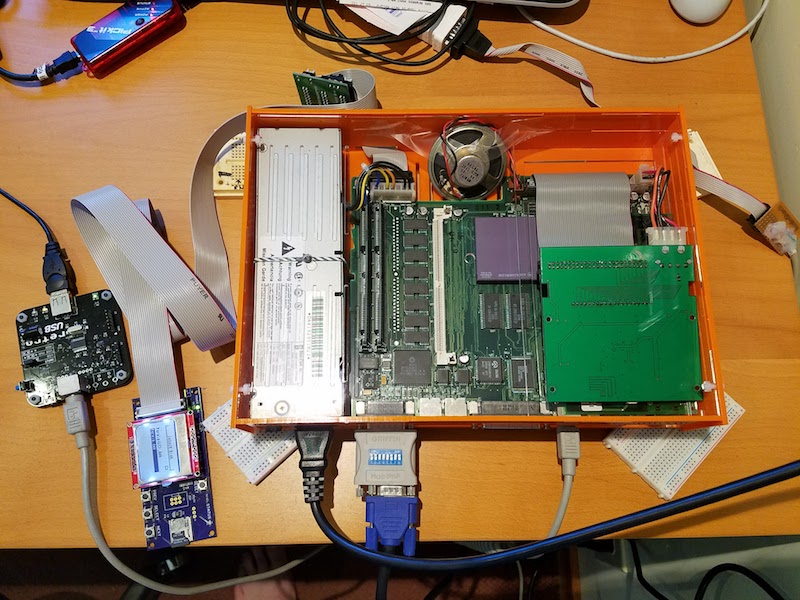
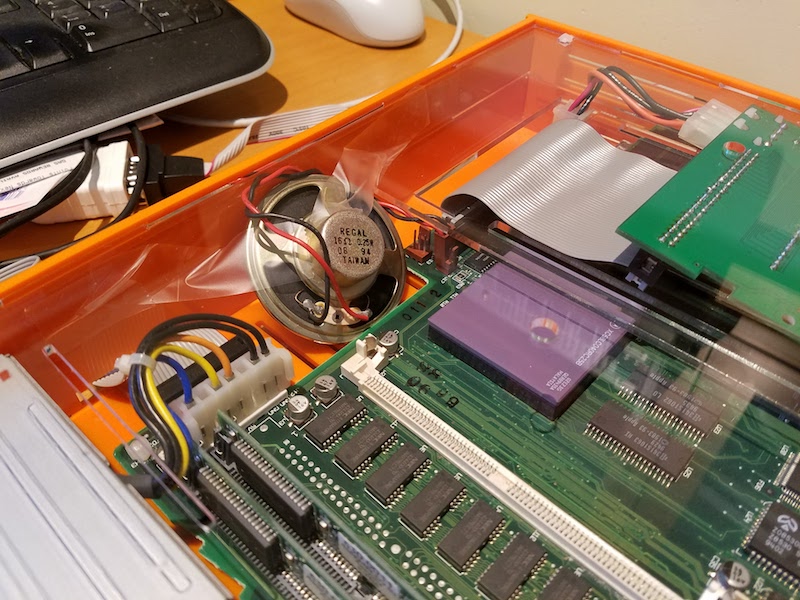
The logic board is screwed into the base piece, and the PSU is strapped down with zip ties. The case is a simple six-sided box, with the addition of a seventh interior piece that I call “the shelf.” This piece separates the rightmost interior region into lower and upper sections. The lower section houses any PDS plug-in card, and the SCSI2SD rests on top of the shelf in the upper section. Because of the way the SCSI cables are oriented, the SCSI2SD is mounted upside-down.
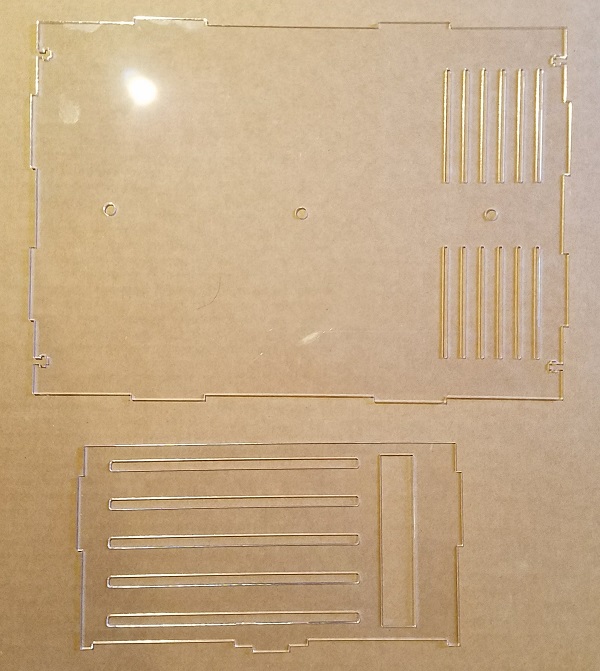
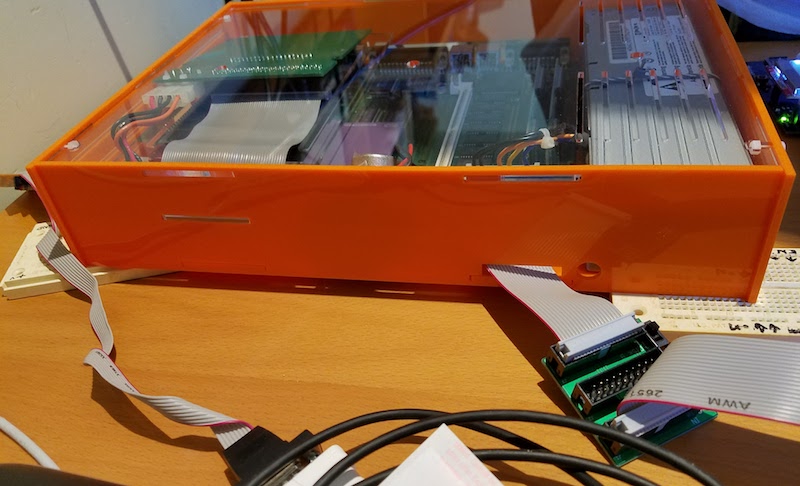
Here are the parts before assembly:
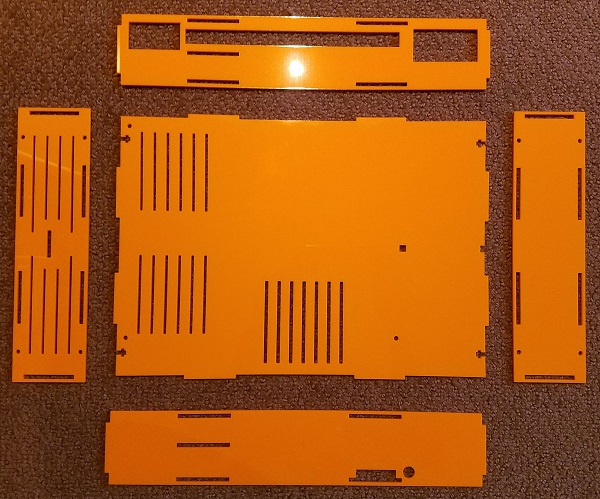
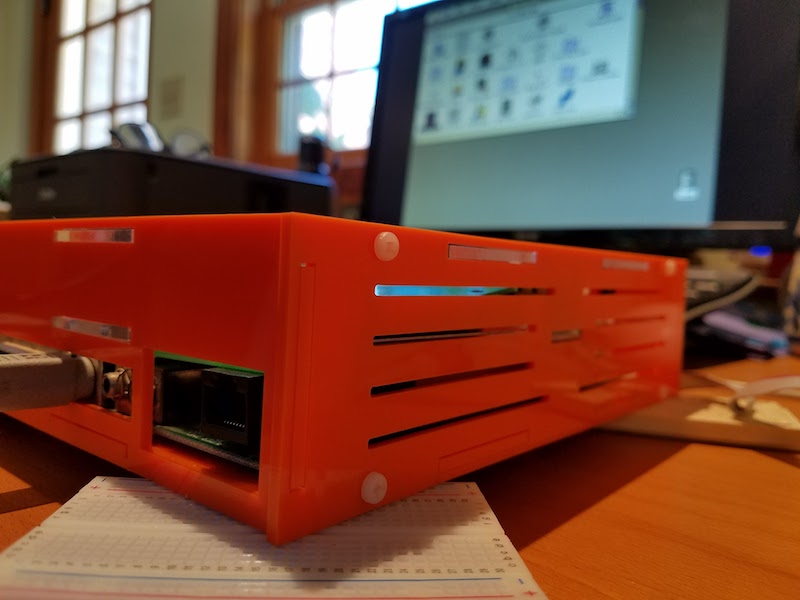
And the final product is shown at the top of this post. It’s an obnoxious shade of orange with a clear top. Who wants beige, anyway?
The speaker is taped to the inside of the case to prevent it from moving around, which is ugly. There’s not enough space for it to lie flat, so it’s propped up at a strange angle. I’ll hunt around for a smaller 16 ohm speaker to use in its place.
There’s a slot in the front where I’ve run a floppy ribbon cable, so I can hook up a Floppy Emu when needed.
The space above and below the shelf is very cramped, and I probably should have made it larger. Initially I couldn’t get my PDS ethernet card to fit, but after shaving a few millimeters by removing the metal shield from around the ethernet jack, it just barely squeezes in. The SCSI2SD was also a very tight fit. Using a SCSI cable with integrated strain relief, it wouldn’t fit, and I had to substitute a different SCSI cable without strain relief that’s a couple of mm thinner.
The case opening for the PDS card is fine, but without the metal shield, there’s a gap around the ethernet jack. Bonus ventilation! Here’s a photo of that, along with the right side vents:
With no fan I thought the computer might overheat, so I was prepared to take some temperature measurements. Stuffed with the guts of a Performa 475, I used an IR thermometer to take some readings at different spots inside the case, and I couldn’t find anything warmer than 112 F / 44 C. I was ready to mount a tiny fan inside, but that doesn’t look necessary now since the passive cooling is adequate.
If anybody wants to build their own, or use this as a starting point for further experiments, take these files. There are two files: one for the bottom and sides, and one for the top and shelf, so you can have the two different sheets made in different colors. Upload the files to ponoko.com, and have each one cut on a P2 sized 3mm thick acrylic of your color choice. You can also use 3mm MDF wood if you want a different look. Along with the case pieces, you’ll need 11 M3x10mm screws with matching nuts. #4-40 size screws probably fit too, but I haven’t tried it. You’ll also want some plastic zip ties to strap down the power supply.
A few things I’d do differently, if I were going to do this again:
- Add about 3mm to the height under the shelf, to fit thicker PDS cards
- Add about 3mm to the height above the shelf, to fit thicker SCSI cables
- Integrate small feet into the side pieces, to elevate the case for better underside airflow
- Have fewer vents around the PSU, and more vents around the CPU and PDS card
- Cut the vent slots into the shape of an Apple logo
- Reposition the floppy cable slot, so it’s better aligned with the logic board’s floppy connector
- Add an opening for a power LED so I can tell when it’s on
Now back to playing with my little orange monster…
Read 6 comments and join the conversationFuture Hardware with Animal Names

Yesterday’s post mentioned some hypothetical marsupial-themed hardware: WiFi Wallaby, Video Platypus, and others. While these were meant as a joke, they got me thinking about what exactly a “Video Platypus” and friends might do, and I’m outlining some possibilities below. These are all tied loosely into vintage Macintosh hardware, although other ideas of interest to the general Arduino/RPi audience would be nice too.
Video Platypus
This might be a way of providing video out for compact Macs like the Plus and SE. I’ve discussed a few potential methods for doing this before. One approach is to directly tap the CRT video and synchronization signals and resample/convert them to a standard format. Another possibility is sniffing the address and data bus to watch for CPU writes to the framebuffer region of main memory, then use that to construct a new video signal.
Video Platypus could also be a converter or upscaler for the Mac II series and later machines. VGA adapters for these machines are inexpensive and easy to find, but VGA itself is a slowly dying standard. It would be nice if I could get a direct HDMI or DVI-D output from my 680X0 or PowerMac. Probably this wouldn’t need to be Mac-specific – it would just be a VGA to HDMI converter with a different physical connector to support the Mac. Something like this must surely exist already?
Disk Kangaroo
An external fileserver would be nice for old Macintosh computers: a device you plug into the computer and that appears as a large local or remote disk. Floppy Emu already serves this purpose when it’s configured in HD20 hard disk mode, but only a small number of Macintosh models support HD20 and have the necessary external floppy connector.
Disk Kangaroo could be something like a Floppy Emu for LocalTalk. Just plug it into the Mac’s LocalTalk port (the printer port), and it would appear as a fileserver. You wouldn’t be able to boot from it the way you can from Floppy Emu, but it would work on virtually every Mac model and system software version. The I/O speed would be about the same as Floppy Emu, I think.
The same idea could be applied to a SCSI disk instead, so the device would appear as a local disk and the computer could boot from it. This would be similar to SCSI2SD, except instead of formatting the whole SD card as a Macintosh disk, the SD card would contain a library of disk images to choose from, just like Floppy Emu. This would make it easier to set up and use for file transfers to and from an internet-connected PC.
Both the SCSI and LocalTalk disks could also use remote storage instead of an SD card. The files could be served from a PC on the same LAN, which would might require some special software on the PC, or the device could potentially do Appletalk-to-Samba translation. Or files could be served directly from a cloud storage account like DropBox.
WiFi Wallaby
Everybody loves the ESP8266 for connecting oddball things to WiFi. What might this do for a vintage computer? Most old Macs are capable of Ethernet networking, although many require an add-in networking card that’s now rare. I’m not sure if it’s easy or even possible to go from that to a wireless network connection.
What might you use this wireless connection for – general web surfing, email, and FTP? Or for connecting to other vintage Apple computers and printers wirelessly with Appletalk?
Maybe this could be like a WiFi version of Farallon PhoneNet. Connect a WiFi Wallaby to each of your computers and printers and they’ll auto-connect and form an Appletalk network. Same idea as the phone cables in PhoneNet, but wireless.
Printer Koala
A clever microcontroller board with the necessary physical connector could emulate an Imagewriter II or other 80’s – 90’s Apple printer. What would be the point of that? Maybe it could act as a print server or translator, enabling the old Macs to use modern printers. The need for printer drivers could make that difficult, though. Or maybe “printing” could perform another function like converting the document to PDF and storing it on an SD card or on a cloud-based server. Or it might implement a print-to-Facebook or print-to-Twitter feature.
Working in the opposite direction could be interesting too: a device that connects to an Imagewriter II or Stylewriter or LaserWriter. The device could put these classic printers on a network so that modern computers could print to them from Windows, OSX, or Linux. There would be a question of printer drivers again, but for relatively simple printers like the Imagewriter that might be doable.
Read 13 comments and join the conversationBuild an Electric Scribble Machine
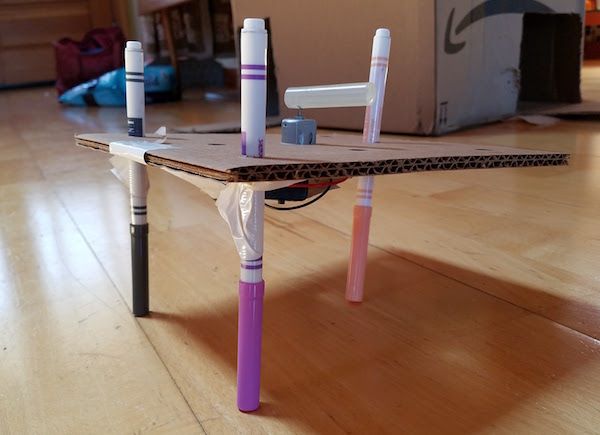
Looking for a creative project for kids to build? The Electric Scribble Machine is an entertaining device that’s easy to build from common parts – great for a scout troop project, school science fair, or just a lazy afternoon at home. For the past several years, as part of our local elementary school’s annual Discovery Day, I’ve led groups of kids ages 7-11 through the construction of a scribble machine. Tomorrow will be my last turn at Discovery Day, so I’m documenting the scribble machine design here for reference.
The basic concept is simple, and is borrowed from an Exploratorium design:
- An off-center weight on an electric motor will cause it to wobble and vibrate
- Mount the wobbly motor to a body made of plastic, cardboard, recycled bottles, or whatever’s available
- Attach colored felt-tip markers to the body to create legs
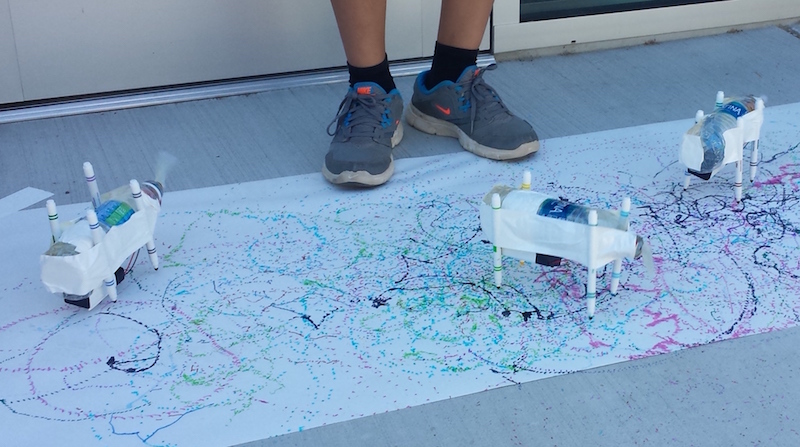
When the machine is placed on a large sheet of paper, it will wobble and jump around erratically, drawing interesting patterns as it moves.
Step 1 – Motor
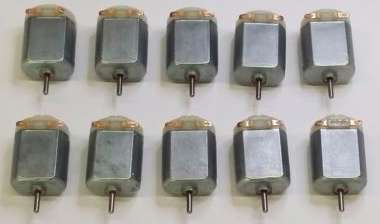
I use cheap DC hobby motors rated for 1.5V to 6.0V. They work fine with just a single AA battery, but are better with 2xAA batteries.
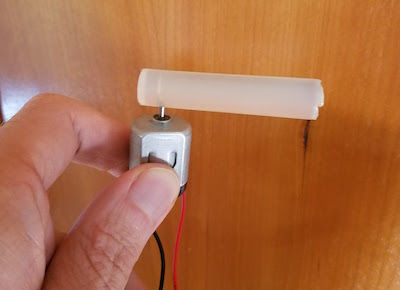
Step 2 – Off-Center Weight
Anything that can be mounted onto the motor’s shaft will work. The more unevenly the weight is distributed, the better. I’ve found that glue sticks for hot glue guns work nicely, and are easy to mount thanks to their texture.
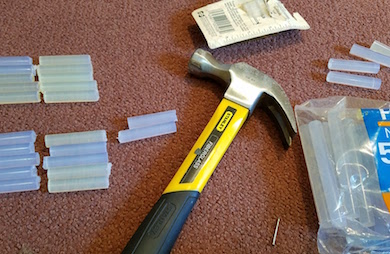
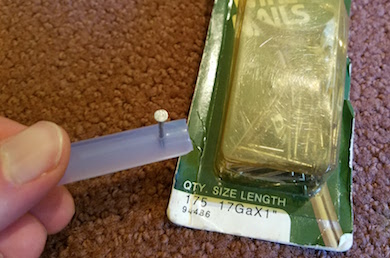
I use generic 4 x 0.44 inch glue sticks, and cut them in half with kitchen scissors to make 2 inch sticks. I hammer in a finishing nail near one end of the stick, then pull out the nail, leaving a small hole behind. The hole makes it easy to press-fit the glue stick onto the motor shaft without any additional tools: just push the shaft into the hole. The rubbery texture of the glue stick holds the shaft tightly, so it won’t easily pull loose.
Step 3 – Battery Holder (optional)
A 2xAA battery holder with an integrated on-off switch helps to create a reliable finished project. In the first years of building scribble machines, I held the motor wires directly to the battery terminals with rubber bands. It worked, but was a constant source of frustration when the wires came loose.
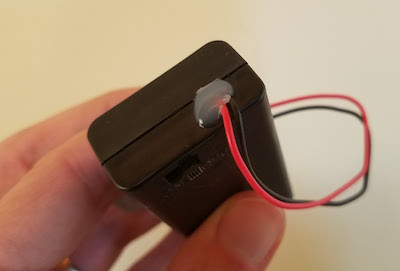
I’ve found that the wires on cheap battery holders are often poor quality, and break easily. Last year, about half of the battery holder / motor units suffered some kind of wire breakage during the day, leading to a lot of unhappy kids and emergency solder repairs. This year, I’ve added a drop of hot glue to the outside of each battery holder at the point where the wires exit. I’m hoping this will serve as a strain relief, and help reduce the number of broken wires.
Step 4 – Soldering (optional)
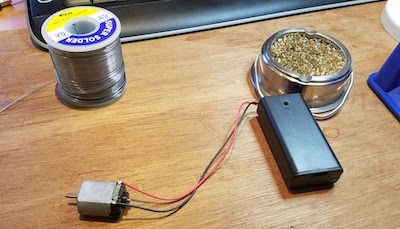
For the most reliable results, the battery holder wires should be soldered to the motor terminals. This is as easy as soldering gets, and it takes only a few seconds. A $15 Radio Shack soldering iron will do the job nicely.
As an alternative to soldering, the battery holder wires could be twisted around the motor terminals with pliers. There’s normally a small hole in the center of each motor terminal, which makes the job fairly easy.
Step 5 – The Body
Here’s an opportunity to get really creative – the body can be made from virtually anything! Try empty water bottles, plastic baskets, DVDs, cardboard, foam board, or whatever else might be handy. In past years I used empty plastic water bottles, sometimes with a few rocks inside to act as ballast. The plastic bottles work fairly well, although they do sometimes get partly crushed by kids who are overzealous in their construction efforts.
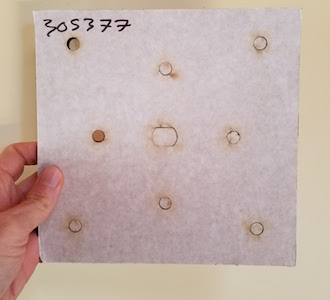
This year I’m trying something new: flat cardboard bodies, with holes drilled for the motor and felt-tip markers. It’s definitely possible to create these from old cardboard boxes, but cutting and drilling is time-consuming and tedious when making more than one or two. I took the easy path, and got squares of laser-cut double-thickness cardboard made by a local service. They were only 84 cents each, and the precise cut-outs for the motor and markers make it easy to snap the components into place. I added eight holes for markers, so the kids can experiment with different placements.
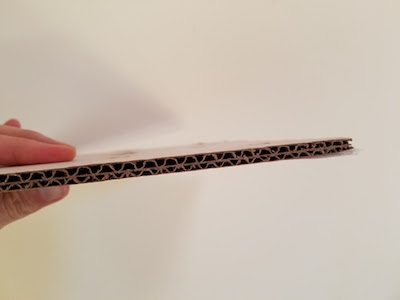
You’re welcome to use my laser-cut design. The Ponoko service will make them for you, if you add the design to your “personal factory” and select a material. Mine were cut from double layer corrugated cardboard, 6.7 mm thickness, 181 x 181 mm size (Ponoko’s standard P1 size).
Step 6 – The Legs
The legs of the Electric Scribbling Machine are generic colored felt-tip markers. Many parents already have dozens of these stuffed into every odd drawer and closet. Washable markers are nice for recovering from accidents, but not required. I used this cheap 30-pack of fine tip markers.
Three legs or four? I’ve tried both, but usually go with four. The design of the scribble machine requires some fine-tuning of stability, and four legs create a more stable base than three. Too much stability isn’t necessarily a good thing, however, since a certain degree of wobbling is required to make a good scribble design. But a high degree of wobbling will quickly lead to wild gyrations, and then the machine will topple over in a sad pile. It takes a few minutes of experimentation with leg lengths and ballast weights to find a happy medium.
Step 7 – Assembly and Use
I normally prepare the battery packs, motors, and glue sticks ahead of time. On the day of the event, the kids combine these with the batteries, body, and legs to assemble a finished machine. It sounds simple, but the assembly process always seems to require a surprisingly large amount of time, usually 30 minutes or more.
Duct tape, masking tape, rubber bands, or hot glue can be used to mount the motor and battery pack onto the body. These are the heaviest components, so it’s best to place them near the center of the body. I’ve found that most 7 to 11-year-olds don’t have the physical dexterity to work with rubber bands, so duct tape is my preferred adhesive method. After mounting the motor and battery, the legs are attached the same way. The caps on the markers add about 1.5 inches to their length, which needs to be considered while mounting them, otherwise the finished machine will sit too low to the ground when the caps are removed.
After watching the machine scribble random designs for a while, it’s time for some directed experiments.
- What happens if one leg is a different length than the others?
- What’s the effect of moving the legs closer to or further from the body’s center of mass?
- Can you configure the machine to wobble forward in a straight line instead of gyrating randomly? Try racing them.
- Reconfigure the motor to lie on its side, spinning the weight in the vertical plane. How does the machine’s motion change?
- Decorate the bodies with stickers and give them cool names.
Shopping List
Supplies for 30 kids:
30 electric motors $45.00
15 hot glue gun sticks $8.69
30 battery holders $24.36
60 AA batteries $11.87
30 laser-cut cardboard bodies $25.20
100 colored markers $17.44
The total cost is about $132, or $4.42 each.
If you build an Electric Scribble Machine, send me a note and tell me how it went!
Be the first to comment!How to Clean a PCB
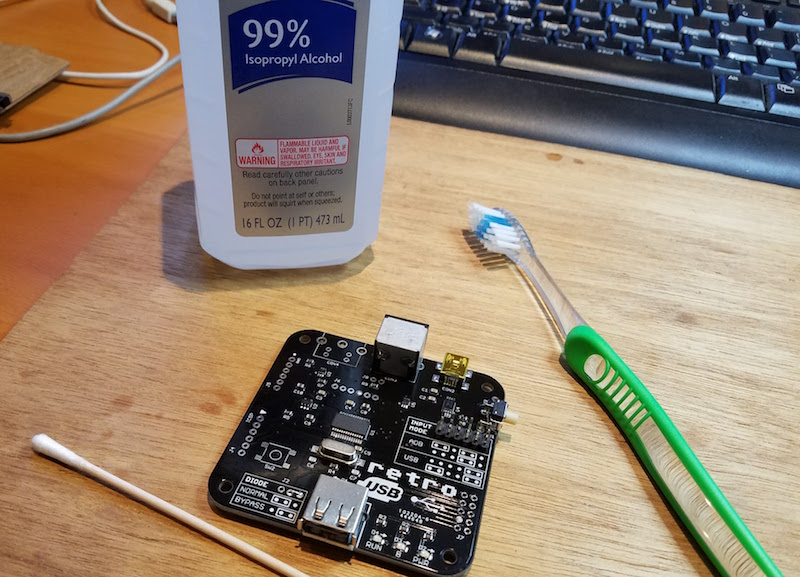
Lately I’ve been assembling a lot of Retro USB boards, and that’s got me thinking about the best way to clean them after assembly. I use a “no clean” flux for my assembly work, so in theory I don’t have to have to clean it off, but if I don’t then it will leave an ugly sticky mess. Unfortunately the black soldermask of Retro USB boards seems to highlight flux residues more than other colors. I’ve also recently started using a gel flux in a syringe instead of a flux pen, and it’s stickier and leaves more residue. So good cleaning is more important now than ever.
In the past, my standard cleaning method was regular cotton swabs (Q-tips) with 99% isopropyl alcohol. It dissolves the flux residue, but the swabs snag easily on the sharp corners of parts, quickly become shredded, and leave tiny cotton fibers everywhere. I’ve now started using Chemtronics cotton tips, which are basically fancy Q-tips designed for industrial use. The cotton is packed and wound more tightly than Q-tips, and they’re “low lint”, whatever that means. It helps reduce shredding and stray cotton fibers, but doesn’t completely eliminate them.
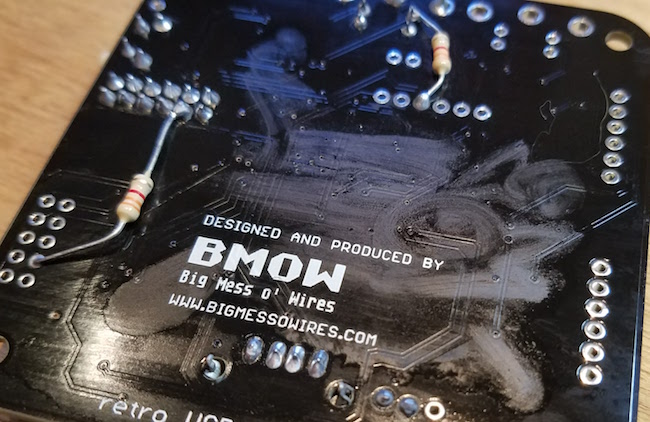
The isopropyl alcohol also leaves a residue that’s visually unattractive, as you can see here. Its visibility depends greatly on the angle of the light, and I’ve intentionally chosen the worst angle for the photo. I’m uncertain if this residue is really from the alcohol, or whether it’s the remnants of the flux dissolved in the alcohol, but whatever it is leaves streaks on the PCB when it dries. I’ve found I need to wait until it dries, then use another dry cotton swab to buff the dried areas and remove the streaks. The end result still isn’t perfect, though it’s pretty good. But the whole cleaning process can be very time consuming, requiring several minutes per board.
It’s my understanding that commercial PCB assemblers wash the finished boards in hot deionized water and some kind of solvent. It’s essentially a special dishwasher for electronics. I don’t have that kind of equipment though, and I wouldn’t be excited about washing PCBs where my kitchen dishware and utensils go. In the past I’ve tried hand-washing finished boards with ordinary hot water and dish soap, and it worked OK but still wasn’t squeaky clean. Washed boards also require a special dryer, or a long period of air-drying to ensure all the water is out before powering the board.
Do you have a favorite method of board cleaning? Leave a note in the comments.
Read 8 comments and join the conversationThe Emerging Retrocomputer Industry
While visiting the Bay Area Maker Faire this past weekend, I was struck by something: we’re seeing the emergence of a full-fledged retrocomputer industry. There were at least two retrocomputing-specific businesses exhibiting (GGLABS and Manila Gear), and a couple of others selling newly-designed systems running BASIC that would have been at home in 1982. Yes, this stuff has been around since back when retrocomputing was just “computing”, and there have always been vendors providing replacement parts for obsolete machines. But it’s only within the past few years that we’ve seen businesses developing new hardware for 25-year-old computers with no practical purpose beyond nostalgia.
This is a surprisingly big market. Name any brand of computer from the 1980s, and there’s almost sure to be someone in 2017 who will sell you new peripherals and expansion hardware for it. Just within the retro-Apple community, besides BMOW and the two others I already mentioned who are developing new retro-centric hardware, there’s Rich Dreher, Nishida Radio, Michael McMaster, A2retrosystems, RetroConnector, Sigma Seven Systems, Plamen Vaysilov, and many many others (let me know who I’ve forgotten). Then there are also general merchandise stores of retro-Apple products, like A2Heaven, UltimateApple2, and Reactive Micro. I’m not always clear whether those are storefronts for a single business’s own products, or whether they’re reselling products developed by others, but either way they’re impressive. If you’re in love with old computer nostalgia from decades past, then these are the golden years.
Read 4 comments and join the conversationBay Area Maker Faire Meetup
![]()
The Bay Area Maker Faire is this weekend. Who’s going? I’ll be there today – and if you want to meet up and say hi, I’ll be at the Make: Electronics stage in building 2 at 3:00 PM. Look for the guy in the BMOW t-shirt.
This will be my first Maker Faire in several years. In the early days I went every year, but after the crowds passed the 200,000 mark I got scared off. Hopefully I won’t get crushed and trampled this time!
Read 4 comments and join the conversation