Archive for May, 2017
Retro USB Firmware Update 0.1.8
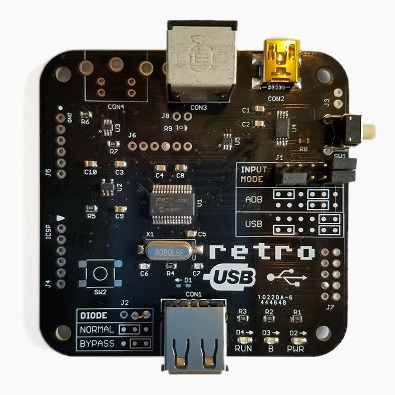
Firmware version 0.1.8 is now available from the Retro USB page. This version adds several improvements:
0.1.8
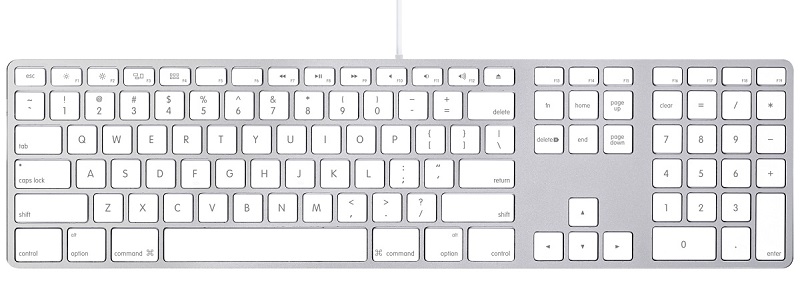
- Added support for ISO keyboards, commonly used outside the USA. This should fix the key mapping for the ^ or @ key (the key to the left of 1) and the <> key (the key to the right of the left shift). Mostly untested since I don’t have any ISO keyboards.
- Keymap type can be cycled between ANSI, ISO, and JIS (currently non-functional) with the new help command Ctrl-Shift-Capslock-T
- The keymap type is automatically set to ISO at startup if an Apple-brand ISO keyboard is detected (untested). If you have a non-Apple ISO keyboard, you’ll need to switch to ISO manually with Ctrl-Shift-Capslock-T.
- Single-function USB devices are now prioritized over composite devices. Prevents a mouse with a keyboard macro feature from usurping the role of keyboard.
- New help command shows the USB vid:pid or ADB handler ID of the keyboard and mouse: Ctrl-Shift-Capslock-I
- Disabled HID report descriptor parser’s error check for report items with count = 0. Some real USB devices do this, like the Logitech RX 250 mouse.
- Added 250ms delay at startup in ADB-to-USB mode, before attempting any external communication
If you have an ISO keyboard, and you’ve previously used Retro USB with firmware earlier than 0.1.8 on an OSX Mac, you’ll need to delete the OSX keyboard preferences to make it “forget” Retro USB. Delete the file /Library/Preferences/com.apple.keyboardtype.plist, then restart. If you don’t do this, your key mappings may be incorrect.
0.1.7
- Permanently enables USB composite device support
- Increases mouse speed by 20% in USB-to-ADB mode
Retro USB is an input converter for USB and ADB keyboards and mice. It works in two directions, connecting modern USB peripherals to a classic ADB-based Macintosh or Apple IIgs computer, or ADB peripherals to a USB-based computer running Windows, OSX, or Linux. The foreign keyboards and mice behave exactly like native peripherals, requiring no special software or drivers – just plug it in and go.
Be the first to comment!USB Voltage Sag

I received a couple of reports that Retro USB doesn’t work correctly with the Apple Aluminum Keyboard, model A1243 and its smaller sibling A1242. This is Apple’s standard wired USB keyboard, so it’s fairly common. The A1243 has an integrated hub with two USB ports for other devices. I don’t have one myself, but I was able to borrow an A1243 from a neighbor so I could take a look. What I found was not good.
During the USB enumeration process, there’s a huge voltage sag on the VUSB +5V supply. This is true whether VUSB is fed from the Macintosh’s ADB +5V supply, or from an external 5V supply. During USB enumeration, VUSB abruptly drops from 5V down to about 2.7V over a period of half a millisecond. Then it recovers, drops again, and repeats the process three or four times. Meanwhile the microcontroller starts reporting USB “bus turnaround” errors. Eventually the voltage bouncing stops after about 6 ms, but the keyboard never enumerates successfully.
At first I thought this was a simple problem: I just needed a bigger capacitor on VUSB. When the A1243 enumerates, it must switch on some internal power-hungry circuit that momentarily draws a lot of current, dragging down VUSB. The Retro USB board has a single 10 uF ceramic capacitor on the +5V USB supply. But when I tried larger capacitors up to 220 uF, they barely made a dent in the degree of voltage sag. With the 220 uF cap, the voltage sags bottomed out at 3.4V instead of 2.7V, but I still got lots of USB errors and failure to enumerate. 220 uF is already a jumbo-sized capacitor, and I can’t imagine fitting something even larger on the Retro USB PCB.
My second thought was to add an inline inductor between the VUSB supply and the USB connector. That would prevent too much current from being drawn all at once. I only had a single suitable inductor on on hand, with an uncertain value: the bag said 22uH, but the component was labeled 223 which I believe means 22mH. At any rate, it didn’t help much, and VUSB still sagged down to 3.2V while the keyboard failed to enumerate. With failures of both the capacitor and inductor techniques, I’m out of other ideas for ways I can minimize or eliminate this VUSB sag.
But wait, there’s more to this mystery. The A1243 actually enumerates OK, with no VUSB sag at all, if nothing is connected to its USB ports. It’s only when a mouse or a flash drive is connected to the A1243 that the big voltage sag occurs. And these same mice and flash drives don’t cause any voltage sag when they’re connected through a different unpowered hub. I’ve come to the conclusion that the A1243 contains a big capacitor that only gets charged during USB enumeration, and only if something is connected to one of its hub ports, so that the hub function is enabled.
I was sometimes able to get the A1243 with an attached mouse to enumerate successfully, if I powered the Retro USB board from an external 5V supply instead of the Macintosh ADB 5V supply. The same degree of voltage sag was still there, so I’m not even sure why it worked, and success seemed to depend on exactly which mouse I tried.
The A1243 also causes problems in other scenarios, even where no voltage sag is observed. It works OK when it’s connected through a separate unpowered hub. But if a mouse is also connected to that same hub, there’s no voltage sag, but there are large numbers of USB errors and none of the devices ever enumerate successfully.
There’s clearly something strange about the A1243’s power requirements, as evidenced by this Apple forum thread full of complaints. A hundred people all agree that their computer wasn’t recognizing their A1243 anymore, until they used the USB extension cable that’s bundled with the keyboard, then it magically began working again. A few people said a 3rd-party USB extension cable also solved their problems. It sounds bizarre, but if the extension cable is acting as a small source of additional inductance and capacitance, I could imagine it having a beneficial effect. However, when I tried using the extension cable with Retro USB and the A1243, the voltage sag was still just as bad and the problems remained.
If the A1243 weren’t such a common keyboard, I’d simply write it off as an unknown incompatibility. But given how common this keyboard is, I really want to find a way to make it work.
Retro USB Firmware Update v0.1.5
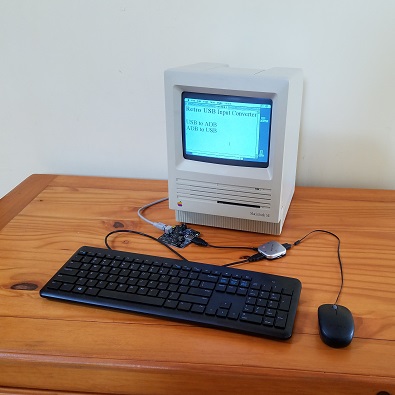
Firmware version 0.1.5 is now available from the Retro USB page. This version adds a few small improvements:
- LED A now illuminates when there’s a working ADB or USB connection to the host computer. LED B blinks when there’s keyboard or mouse activity.
- F13 now functions as an ADB power key in standby mode, just like PRINT SCREEN. Some USB keyboards don’t have a PRINT SCREEN key, some don’t have F13, so you can’t please everybody.
- Special ADB keycodes for the right-side shift, control, and alt keys are no longer sent unless the host computer specifically requests them. This fixes some weirdness with these keys on the Apple IIGS at the BASIC prompt.
Retro USB is an input converter for USB and ADB keyboards and mice. It works in two directions, connecting modern USB peripherals to a classic ADB-based Macintosh or Apple IIgs computer, or ADB peripherals to a USB-based computer running Windows, OSX, or Linux. The foreign keyboards and mice behave exactly like native peripherals, requiring no special software or drivers – just plug it in and go.
Read 2 comments and join the conversationHow to Clean a PCB
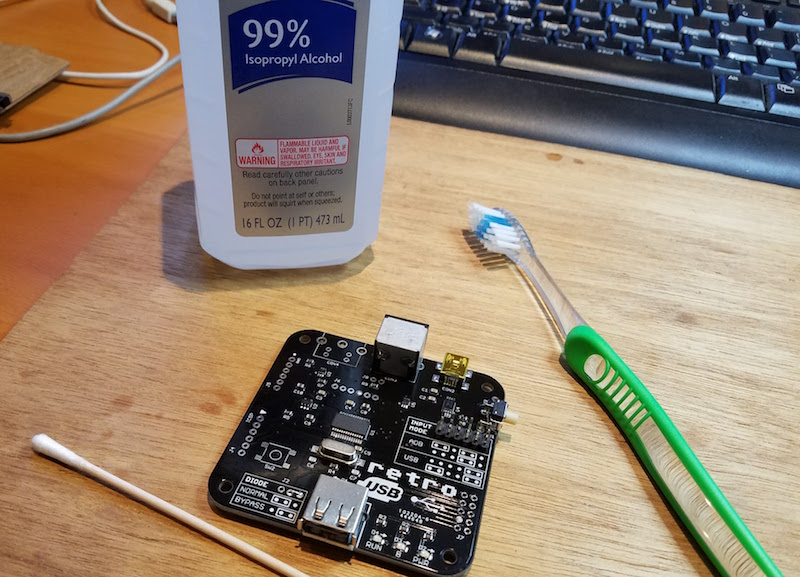
Lately I’ve been assembling a lot of Retro USB boards, and that’s got me thinking about the best way to clean them after assembly. I use a “no clean” flux for my assembly work, so in theory I don’t have to have to clean it off, but if I don’t then it will leave an ugly sticky mess. Unfortunately the black soldermask of Retro USB boards seems to highlight flux residues more than other colors. I’ve also recently started using a gel flux in a syringe instead of a flux pen, and it’s stickier and leaves more residue. So good cleaning is more important now than ever.
In the past, my standard cleaning method was regular cotton swabs (Q-tips) with 99% isopropyl alcohol. It dissolves the flux residue, but the swabs snag easily on the sharp corners of parts, quickly become shredded, and leave tiny cotton fibers everywhere. I’ve now started using Chemtronics cotton tips, which are basically fancy Q-tips designed for industrial use. The cotton is packed and wound more tightly than Q-tips, and they’re “low lint”, whatever that means. It helps reduce shredding and stray cotton fibers, but doesn’t completely eliminate them.
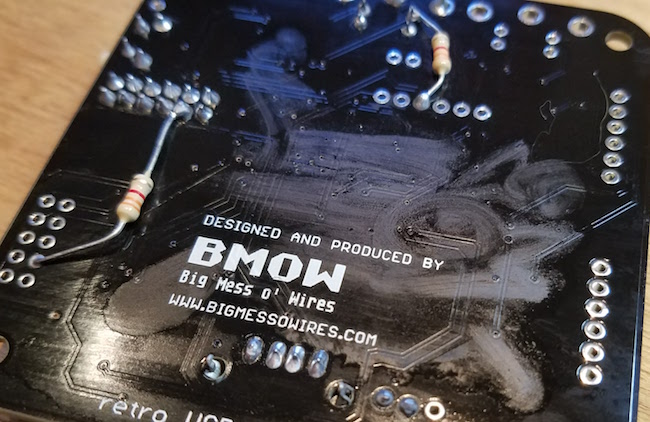
The isopropyl alcohol also leaves a residue that’s visually unattractive, as you can see here. Its visibility depends greatly on the angle of the light, and I’ve intentionally chosen the worst angle for the photo. I’m uncertain if this residue is really from the alcohol, or whether it’s the remnants of the flux dissolved in the alcohol, but whatever it is leaves streaks on the PCB when it dries. I’ve found I need to wait until it dries, then use another dry cotton swab to buff the dried areas and remove the streaks. The end result still isn’t perfect, though it’s pretty good. But the whole cleaning process can be very time consuming, requiring several minutes per board.
It’s my understanding that commercial PCB assemblers wash the finished boards in hot deionized water and some kind of solvent. It’s essentially a special dishwasher for electronics. I don’t have that kind of equipment though, and I wouldn’t be excited about washing PCBs where my kitchen dishware and utensils go. In the past I’ve tried hand-washing finished boards with ordinary hot water and dish soap, and it worked OK but still wasn’t squeaky clean. Washed boards also require a special dryer, or a long period of air-drying to ensure all the water is out before powering the board.
Do you have a favorite method of board cleaning? Leave a note in the comments.
Read 8 comments and join the conversationMEGA, and the Future of ROM-inator II
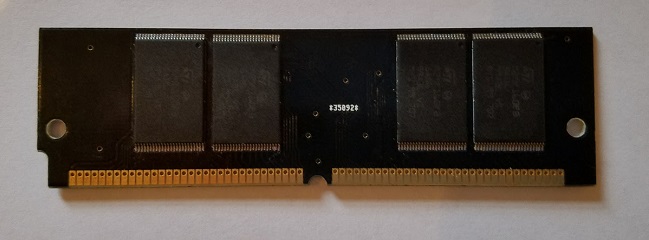
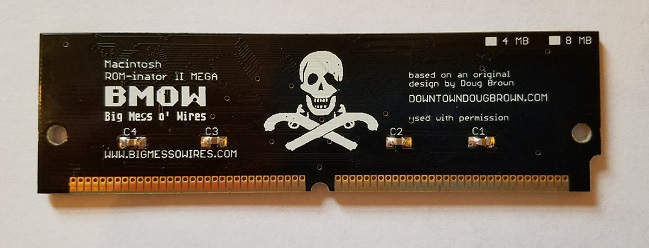
It’s my pleasure to introduce the Mac ROM-inator II MEGA, with 2x the storage capacity of the original ROM-inator II SIMM. Like the standard ROM-inator II, the MEGA replaces the stock Macintosh II series or SE/30 ROM with a programmable flash memory module. Once installed, the flash ROM takes over the Macintosh, allowing for a bootable ROM disk, new startup sound, new icons, HD20 support, 32-bit clean ROM, and other crazy customization possibilities.
I’m assembling the MEGA SIMMs as needed, so the order processing time will be longer than for other BMOW products. The standard ROM-inator II SIMM will remain available, and is probably still the best choice for most users. But for those looking for the largest possible ROM that the Macintosh II series machines can support, the MEGA is a great option.
The default ROM disk image has been expanded for the MEGA. Thanks to the FC8 on-the-fly decompression that I implemented last year, the 8MB of flash on the MEGA is enough to store the 512KB system ROM and a 12MB disk image full of classic utilities and games. The utility programs include ResEdit and some SCSI tools, which should be useful for anyone configuring a new hard disk. Both the MEGA and the original ROM-inator II SIMMs can be reprogrammed with the optional ROM SIMM programmer.
The Future of ROM-inator II
Both styles of ROM-inator II SIMM use a set of 16 megabit 5V flash memory chips to interface directly with the Macintosh bus. There’s only one manufacturer that still makes this chip, and they recently moved it to “end of life” status, with an official retirement date of March 2018. The chips are still available for now, but already the supplies are dwindling, and the price is going up. This isn’t good news for the long-term viability of the ROM-inator II products.
I may place one final order for a large number of chips before March 2018, but after that I don’t see a clear path forward. Using 3.3V flash memory would require level converters for 60-something memory bus signals, with 32 of those requiring bidirectional level conversion. That would be expensive, and difficult to physically fit and route on a 3 inch SIMM.
Smaller capacity 5V flash memory chips remain available, and I could conceivably design a ROM-inator II Mini with 512KB or 1MB of total storage. That would be enough for a modified system ROM with the new startup sound, new icons, HD20 support, and 32-bit clean ROM. But it would leave little or no space available for a ROM disk.
We’ll see what 2018 brings. Until then, enjoy the ROM-inator II hardware while it lasts!
Read 4 comments and join the conversationThe Emerging Retrocomputer Industry
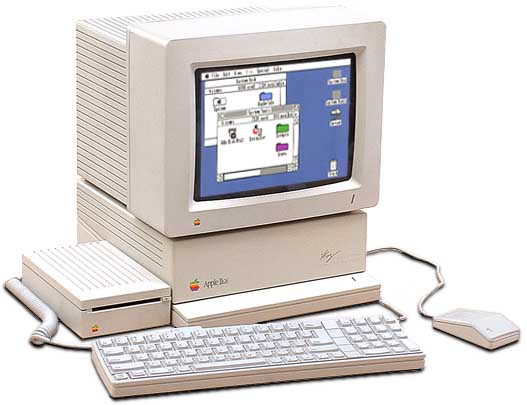
While visiting the Bay Area Maker Faire this past weekend, I was struck by something: we’re seeing the emergence of a full-fledged retrocomputer industry. There were at least two retrocomputing-specific businesses exhibiting (GGLABS and Manila Gear), and a couple of others selling newly-designed systems running BASIC that would have been at home in 1982. Yes, this stuff has been around since back when retrocomputing was just “computing”, and there have always been vendors providing replacement parts for obsolete machines. But it’s only within the past few years that we’ve seen businesses developing new hardware for 25-year-old computers with no practical purpose beyond nostalgia.
This is a surprisingly big market. Name any brand of computer from the 1980s, and there’s almost sure to be someone in 2017 who will sell you new peripherals and expansion hardware for it. Just within the retro-Apple community, besides BMOW and the two others I already mentioned who are developing new retro-centric hardware, there’s Rich Dreher, Nishida Radio, Michael McMaster, A2retrosystems, RetroConnector, Sigma Seven Systems, Plamen Vaysilov, and many many others (let me know who I’ve forgotten). Then there are also general merchandise stores of retro-Apple products, like A2Heaven, UltimateApple2, and Reactive Micro. I’m not always clear whether those are storefronts for a single business’s own products, or whether they’re reselling products developed by others, but either way they’re impressive. If you’re in love with old computer nostalgia from decades past, then these are the golden years.
Read 4 comments and join the conversation
